September 14, 2011

{Preserving Memories}

I got into researching my family history in college.  When I was stumped and didn't know which direction to go, I thought, "What I wouldn't give to know more about my ancestors."  I wished they had a journal or diary where I could read about my Great-Great Grandfather's daily life.  How did my Great-Great Grandmother meet my G'G'Gpa?  What was their home like? 

So, I decided I should really journal for my descendants.  I started okay in the beginning.  I recently looked at it and took it on a trip where I thought would be a perfect opportunity to update it.  I opened it to my last entry - 2009.  It was regarding the scare of the worst flu predicted- the swine flu.  Thankfully, it ended up not being as big as anticipated. 

Two years, I guess it was too much pressure.  I felt like I had to be descriptive, spell out the maiden names of people I was talking about so other's reading it later on would know who I was talking about.  And so, it has been sitting for the last two years, waiting for the next perfect entry.

In the meantime, I felt like I had to jot my family's daily happenings somewhere, so I would remember.  And so my refrigerator calendar became my journal.  Different colors and sizes describe special and even simple events. Going to visit family, family coming up to visit, the day I planted my winter garden and what I planted.  The first time I found out if I was having a boy or girl both pregnancies.  (Girls both times).  It even substituted for filling out my daughter's baby books.  I have updated some of the information, transferring it to the baby books once a year.  I have kept all of my calendars for the last 10 years since I have been married.  It is fun to look back, there are so many things I have already forgotten that happened this year. 

Although it is not beautiful like a well crafted scrapbook (it has always felt too permanent), or a lovely documented journal, I have "preserved" my memories.  Maybe someday, I will figure out a way of a more sophisticated way to pass this down, but until then, I will keep my calendars and look back at my memories fondly.

How do you Preserve your Memories?

August 22, 2011

Succulents and Shells Centerpiece

{ a d.i.y. project }

I was recently in Laguna Beach, California with my husband celebrating our 10th wedding anniversary.   It is a stunning place and I was so inspired by the laid back atmosphere, and the beautiful scenery.  The combination of the ocean and the succulents was something I had not expected and I fell in love.

I am always looking for ideas when I travel.  Ideas for work, ideas for my home, ideas for my ETSY shop.  For my home, I had added a few beach elements to my master bathroom but it was missing something.  I could never figure out what was missing until I visited Laguna.

There are many wonderful shops to browse and one lovely shop had many nautical and shell inspired home decor.  There were several centerpieces with succulents and seashells. I loved them, but I didn't like their price tag. So, I decided to create my own.

You can create one too, here are the details, step by step.

Select a container for your centerpiece. 
I have had this one for years, and it fits perfectly on my window ledge in my bathroom.


My "before" picture of my accent in my bathroom.  Just ho hum.


Select seashells for your new centerpiece. 
Play with different sizes, colors and textures.
I purchased these while in Laguna Beach. 
I thought it would be difficult to find them in the desert!


Select faux succulents for your centerpiece. 
I purchased the faux coral while in Laguna Beach because it was so unique. 
The large succulents I found on sale at Pottery Barn, and the two smaller I found at JoAnn's.


Purchase dry floral foam and natural moss for covering. 
Add the floral foam blocks in your centerpiece. 
Don't be afraid if it doesn't fit perfectly. 
You will be covering them with the natural moss. 


I used four of the blocks to fit my centerpiece, and didn't cut any of them!


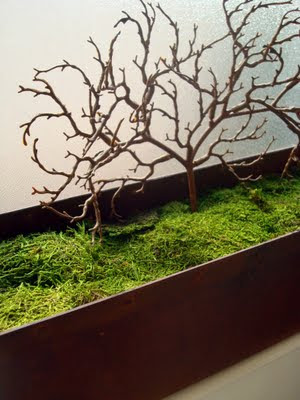
Cover the floral foam with the natural moss.  The moss I used came in pieces. 
Don't worry if it doesn't cover perfectly.  All things in nature are not perfect. 
I love how the different pieces gave a natural, rolling hill look.


Detail photo of Natural moss for covering the floral foam. 
Select a back drop for your centerpiece.  
I put the faux coral centered in the centerpiece as my back drop.


Overall image with moss and faux coral.
You could also cover the foam in white beach sand, in lieu of the moss.


Start placing your succulents, and decide where you want your impact. 
I started with the larger succulents.  I staggered them to make it look more natural. 
I love this starfish, and I liked how it filled the back corner. 
I just pushed the succulent base through the moss.  No cutting necessary.


Continue by adding the remaining faux succulents and seashells. 
Play with the different heights and textures.


Continue by adding the remaining faux succulents and seashells. 
 I just placed these where you see them.  No glue.


Finished centerpiece.  It finally adds that touch I was missing in my master bathroom.


This project was so easy.  The hardest part I had was trying to find all of the succulents.  It was important to me that they looked realistic.  This centerpiece added just the right thing that was missing in my master bathroom. 

Now I can look at it and remember my fabulous vacation to Laguna Beach and my 10th Aniversary.  I just wish I could feel the ocean breeze from my desert home.

I would love to hear your thoughts. 


July 8, 2011

Color, You can do it!

I am a commercial interior designer (by day).  I design office buildings.  I have found in a commercial setting people are much more open to using color.  In peoples homes, most play it safe by adding pastels or minimal color.  Think about the last time you have been to a retail store or building lobby.  What stands out to you when you enter the space?  The simpliest and cheapest impact is color, paint specifically.

You can add a deep, saturated color in a space even if it is small.  Where is the key.  Having a single, impactful wall sets the tone without being over-powering.

Neutrals are good, but add a splash of color with it.  I am obsessed with henna red, and shades of browns and oranges in my home.  The first thing I did when I moved into my house was paint a deep brown in my entry way that runs into the living room.  I was bored with the white walls from apartment living for so many years.  It is a single wall and I left the rest of the living room with white walls.  It sets the tone for the room without being overpowering.  It serves as a nice backdrop for my entry table, and my TV and pictures on the walls.  I have brown sofas and mahagony wood.  It would be deadly with all of these browns, tan carpet, and tan stone table.  I added henna red pillows on my sofas and it added just the right punch.  If I get tired of this color, they are easy to replace with new ones.

I have a grouping of pictures on my living room wall.  I was getting tired of all of them, but couldn't seem to find the right pictures to replace them, at least the ones I could afford.  I changed out three of the pictures that were just okay, and framed pretty scrapbook paper in the original frames.  (See my post Cheap Art, Big Impact.)  I used the same color combination in my living room to tie it all in.  I feel it is just the right touch.


Choose a color that has more "gray" in it than a true color for a wall.  True colors are great for clothing, paper, and more, but when it comes to walls it will look juvenille and unsophisticated.  You can start with your favorite true color, blue for instance.  Then look at the section that is more gray.  Big difference, but still will look lovely.


                                Bright Blue Wall - Too bright, unsophisticated, Courtesy of Sherwin Williams


                                           Blue Wall - Impactful yet refined , Courtesy of Sherwin Williams

So, choose locations wisely, pick a color that may seem a little darker than what you would normally choose, try it on for size.  Paint a large enough sample on your wall to get the feel of the color.  Remember paint is cheap and easy to change. 

You can do it!

How to follow a blog

Thank you for reading my entries in my blog, and I hope you find them fun and helpful to read.  To make something worthwhile, it is more fun to have involvement with others.  I write in hope to add a little joy in your day.

My friend Mary with BizBlogStar http://bizblogstar.blogspot.com/ wrote an article on why you should read a blog and become a follower, so I wanted to take some tips from her to share with you.

I would love if you would follow my blog.  That way you won't miss any new information I share.  It does not give me your contact information, and you can follow anonymously if you prefer.

I will strive to make all content useful, fun and helpful.  I welcome all feedback.  Below are the directions to follow my blog.

Google - how to follow a blog
Go to the section to the right labeled "Followers"...where you see the beautiful faces of my current followers...just click on the Followers widget and it will lead you to your Google account or ask you to create one.  Once you have established a Google account, you can easily view all the blogs you follow on your dashboard and/or reading list. 

Thank you!   
 

June 17, 2011

Cheap Art, Big Impact

I have a grouping of pictures on my living room wall.  I purchased them several years ago.  I had grown tired of them, and looked and looked at various stores for new options.  Of course I am picky, and in my search I either didn't see anything I liked, or what I found was too expensive.

Then one day, I had pulled out my collection of scrapbook paper.  I love scrapbook paper.  I love the various colors, patterns, textures, the 12x12 size.  I have a large collection, and I have tried scrapbooking and it feels too permanent for me.  I have to make sure I have photos ready, which takes way too long for me to decide which one is the "one".  To scrapbook and only use one or two pictures on a page seems inefficient, and it takes me hours to do two coordinating pages!

But, I love the paper, and I decided to use it as art when I was expecting my first daughter.  At the time, I was looking for just the right art.  Of course, I couldn't find anything that also was the right price.  So, I used scrapbook paper as art!  I was so pleased with how these turned out, I did a "grown up" grouping for my oldest daughter when she was moved to her big girl room.  (Images below)  For my youngest daughter, I just recently did a grouping for her room too.  The poor second child had her sister's nursery art in her room until just a few months ago.  She just turned three.


My Oldest Daughter's Room decor

Back to my living room, one day I had pulled my collection out and got the idea to substitiute three of the just okay pictures with framed scrapbook paper.  I choose colors and a pattern that fit with my living room decor.  The other three pictures which are all in black and white, I left alone.  I put the new paper in the old frames, and returned them back in the same position in the wall.  It was just the right touch, and so inexpensive!  It cost me only $2.00!

Living Room Wall Grouping

New framed art

New framed art

Living Room Grouping - Close up


June 10, 2011

June 7, 2011

the Sweetest Summer Giveaway

I am so excited to announce my first giveaway,
the Sweetest Summer Giveaway. 
We have a winner!  Congratulations Ayumi Kamata.  I will contacting you shortly with the details!

I have teamed up with three talented ladies of Curly Q Bowtique, SewCute LLC and Danielle Renee Photography to offer you this exciting giveaway.


French imported, blue, pink, and yellow woven paisley ribbon belt.
1 1/2" wide by 42 1/4" long. Valued at $22.00.


Photo Correction for up to 10 personal photos, a $25 value.
Add vibrance and life to dull photos or
special effects like black and white or a vintage look to your favorite photos.


Here are the details:
*******************************************************
You only need to enter once to win.  Please leave one comment here on the blog after you've performed all tasks.  Also, please leave a comment on each Facebook page to let us know you are participating in the giveaway.

1. Become a fan of the Sweetest Memory on Facebook.
2. Become a fan of Curly Q Bowtique on Facebook.
3. Become a fan of SewCute LLC on Facebook.
4. Become a fan of Danielle Renee Photography on Facebook.
5. Visit the Sweetest Memory on ETSY http://thesweetestmemory.etsy.com.  In your post let me know you will be spending your $25.00 shop credit.
6.  Post this giveaway on your wall to spread the word!

Contest starts: Tuesday, June 7th
Contest ends: CLOSED                                   

Winner was chosen by Random.org.
******************************************************
GOOD LUCK!!  Contact me if you are having any trouble at thesweetestmemory@cox.net

June 6, 2011

A Garden Party

My daughter's Garden Party turned out great.  Here are some photos of decorations and food.  I served snack food - pb&j sandwhiches cut in butterfly and worm shapes, ants on a log, Cheetos (catepillars), pita chips and hummus, Lemonade (bug juice), fruits and veggies.

For the cupcakes and single cake, my daughter wanted pink.  So, I made strawberry cupcakes and put pink covered yogurt pretzels on top to make butterflies.  They worked out great on the cupcakes.  They started sliding on the small cake and so I had to save them with toothpicks!

Colors for the party were pink (my daughters favorite) and orange.  I found the perfect plates from Target that had butterflies, and polkadots in pink and orange. 

Activites for the kids consisted of a frog/snake (pretend) hunt in the garden with butterfly nets, planting seeds and decorating pots and plant markers, decorating paper bags with bug foam stickers, using cupcake liners and pipe cleaners to make flowers.  The paper bags were handy for transporting the planted plants neatly in the car.  (I had not thought of that part of it until the party.  It was a happy accident!)  I also had bug felt masks for the kids to wear (Target Dollar spot.) 

Party favors were bug tatoos, stretchy bugs, small bug catchers, stickers, silly bands in garden themes, pencils, the potted plants, and frogs/snakes from the hunt.  Another cute idea that I didn't implement was Target had larger bug catchers at spring time.  I thought these would be great to fill instead of a bag for a cute look.  I was unsure of who all would be attending, so I ended up filling clear orange bags instead.  Favors for the adults were mini pots with seeds to add to their own garden.

Thanks to everyone for making it a special day!


May 25, 2011

Garden Party planning

I am working on getting ready for my daughter's 3rd birthday on Saturday.  I have chosen a garden theme.  I love doing different party themes, not based around characters.  Last year when my daughter turned two, I chose a bumble bee party.  My husband asked, "Do you have to always do a theme?  Don't you think it is over the top?"  I think it comes from when I went to design school, I was taught you need to have a concept to proceed with a design, and from there it just flows.  Yes, I need a theme, and Yes I am going to take it to the tenth degree.

I have been lucky to have a good friend Marlis whose daughter is 2 months older than my daughter.  The past two years, she has let me borrow decorations from her for my party themes.  She had decorated her nursery for her kids in a bumblee bee theme, so she had fabulous decorations that I utilized last year. 

This year her daughter had a Pinkalicious party. She always throws a great party that could be featured in Martha Stewart magazine.  She made darling pink pom poms, flower paper decorations and so much more.  I had already thought of my theme a couple months before.  (It is a sickness).  Right after the party she gave me stuff from the Pinkalicious party and from a butterfly party she threw for her daughter a previous year.  I am so grateful to have fabulous decorations for the party.  I took the paper flowers she made and put them in terra cotta pots with fun pink crinkle paper.  Here they are waiting for the party.  I am going to put orange centers - my colors for the party pink and orange.

Ideas for the party, I always like to do a craft to keep the kids busy.  I had seen where you can take cupcake liners and make them into flowers on paper.  I am going to try to do that but also provide green pipe cleaners to make freestanding flowers.  For the boys, I think I will try and do mini cupcake liners and string them together with the pipe cleaners to make a catepillar.  I found really cute colorful pots in the dollar spot at Target and cute kids garden shovels at Michael's so we are going to plant seeds in a pot for the kids to do and take home.  Still thinking of maybe doing a fun game.

Stay tuned, I will be sure to share photos from the party.

May 21, 2011

New to This

I am new to this, and not quite sure what to write.  I have started a new creative outlet through ETSY making children's decor, home decor and my new favorite vintage items.  I have a featured guest artist every two months.  My guiney pig and first guest artist is with my friend Marlis of CurlyQ Bowtique.  My next guest artist Mary with SewCute LLC will be starting the first of June.  She sews and is very crafty! 

I have a couple of other interested people for the next couple of slots.  I am surprised when I speak with friends and let them know what I am doing, I find out how many talented people are out there!  I know people who are starting up photography, want to make homemade dog treats, sew, design jewelry.  It is so nice to have a creative outlet!

Please stay tune for an exciting give away to be awarded the end of the month!